Intermission: installing a local web server
HTML is an approachable language, which was one reason I wanted to make this web book. It’s forgiving. If you remember the first chapter—that first website we made that was just a sentence or two—you’ll recall that we didn’t use a single HTML tag. But we could still open the file in the browser and see our content. We put that file on the web, and it worked! You can start simply and layer on the complexity as needed.
We’re now at one of those points. In the next chapter, we’ll create a fun page with jokes, tabletop gaming resources, and embedded YouTube videos.
Unfortunately, YouTube videos may not work with the way we’ve been previewing our site—opening HTML files with the web browser. For the most part, that’s a perfectly okay way to preview HTML. But in cases where we are fetching data from other websites—like streaming video—we’ll need to mimic a real-life web server.
A web server is a program that makes a website available at an address. When you visit that address with a web browser, you get the website. We’ll install and run one of these so that our website is available at a local address—that is, one that’s only accessible to our computer, not everyone on the internet.
I’ll give you several options based on the operating system and technical knowledge needed. But first, let’s talk about URLs.
Relative vs. absolute URLs
Thus far, since we’ve been opening our website files directly in the browser, we’ve needed to use relative URLs. Relative URLs are written from the perspective of the current file. For example, if I am on a sub-page and want to link to a top-level page, I need to use the .. syntax to “move up” a level and find the destination page.
When running a web server, we can use absolute URLs. An absolute URL is always written from the perspective of the topmost level (the topmost level meaning the folder that we told the web server to use). No matter what sub-page I’m on, I could link to the website homepage as follows.
<a href="/">Go to the homepage</a>The slash represents the topmost level (I could also have written /index.html but that isn’t needed because web servers will automatically use it if it exists). If I wanted to link to the about.html page, I could do that as follows.
<a href="/about.html">Go to the About page</a>The cool thing is that it doesn’t matter what page I’m on—it can be a top-level page or a sub-page. This path will always lead to the About page, no matter where the current page is. Say we’re on a page that’s nested down in a folder.
<!-- imagine we are currently on a blog page /blog/my-post.html-->
<h1>My blog post</h1>

<!-- instead of this, which *does* work -->
<a href="../about.html">About</a>

<!-- we can do this -->
<a href="/about.html">About</a>
We didn’t use absolute URLs earlier because we weren’t using a web server. Had we tried to use absolute URLs when opening our website directly in the browser, the slash would have pointed toward the top-level folder of your entire computer, which is certainly not what we wanted.
Now that we’re using a web server, I’ll leave it up to you if you’d like to go back and change all the paths, but it does make copying and pasting the menu easier. Creating links between pages is more straightforward when using absolute URLs.
Web server options
Here are various options for running a web server on your computer. You don’t need to read everything. Use the links below to jump to the section that applies to you.
- Visual Studio Code (cross-platform)
- macOS
- Windows and cross-platform
- Python and PHP (cross-platform)
Visual Studio Code (cross-platform)
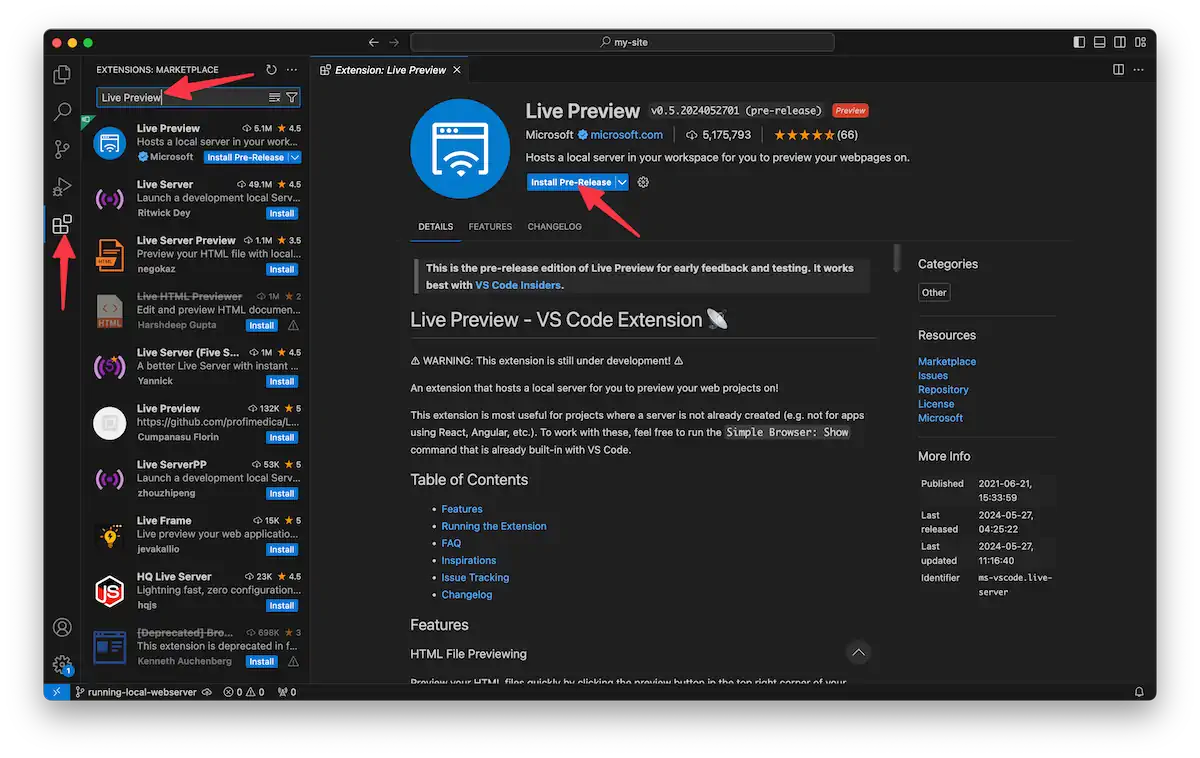
Microsoft publishes a VS Code extension called Live Preview. It runs your site on a local web server and auto-refreshes as you change it. You can install it from that link or click the extensions icon and search for it.
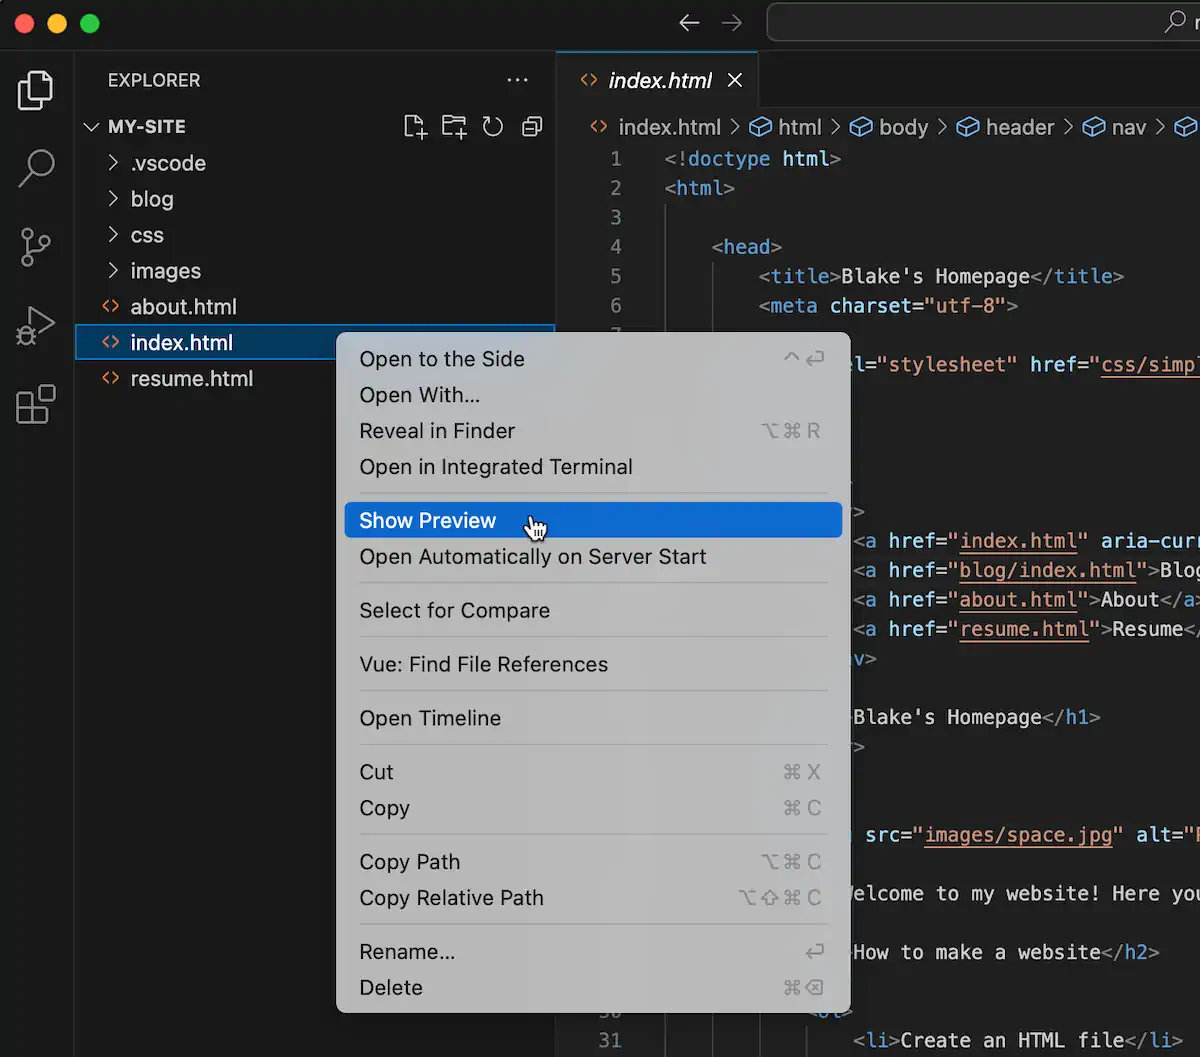
Once installed, you’ll notice a Show Preview option when you right-click a file.
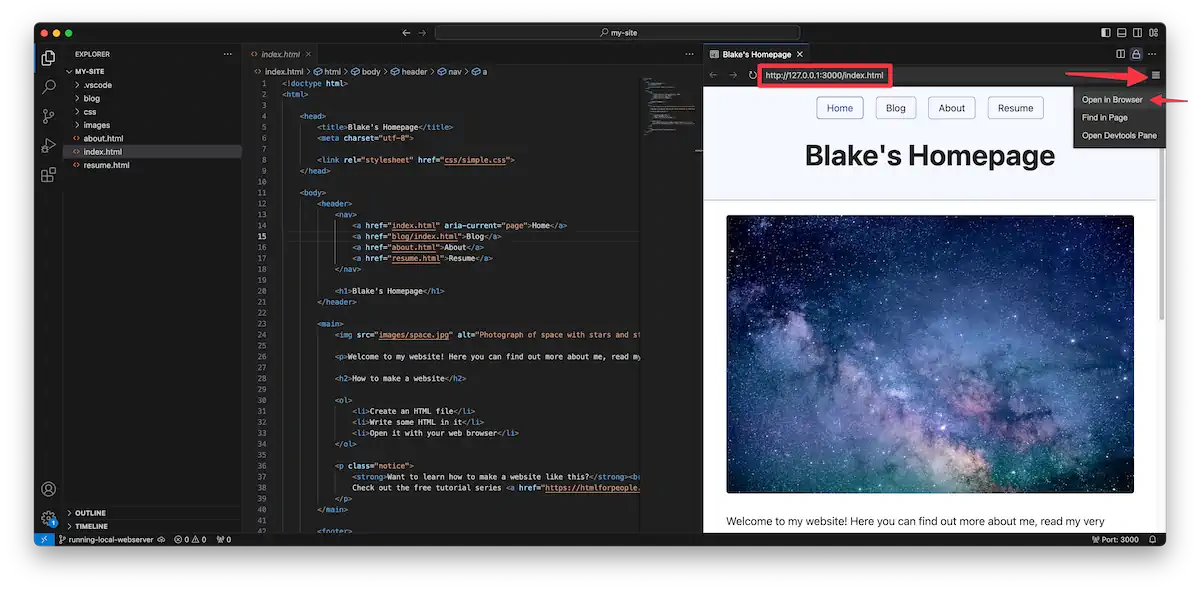
Clicking it will open a side panel with a web view at a local address. You can either use that preview, open it in the browser by navigating to the address, or click Open in Browser in the address bar menu.
macOS
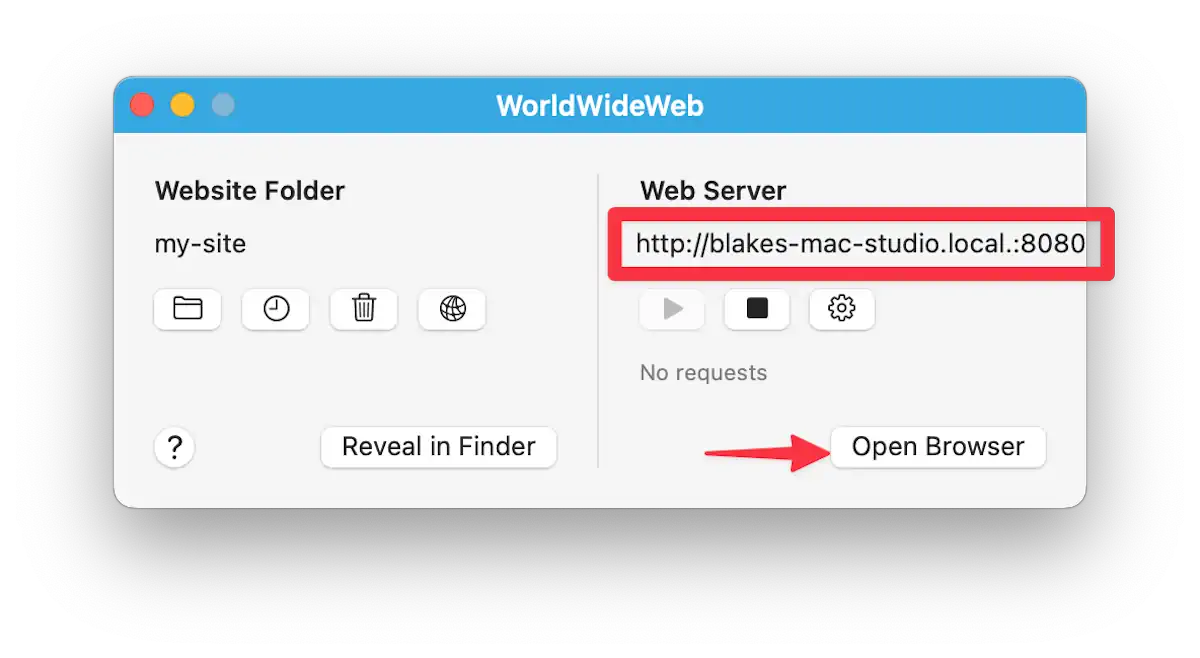
I’m a Mac user myself, so I can highly recommend the excellent WorldWideWeb app. It’s free for our purposes but has a Pro upgrade that will automatically reload the page when you make changes.
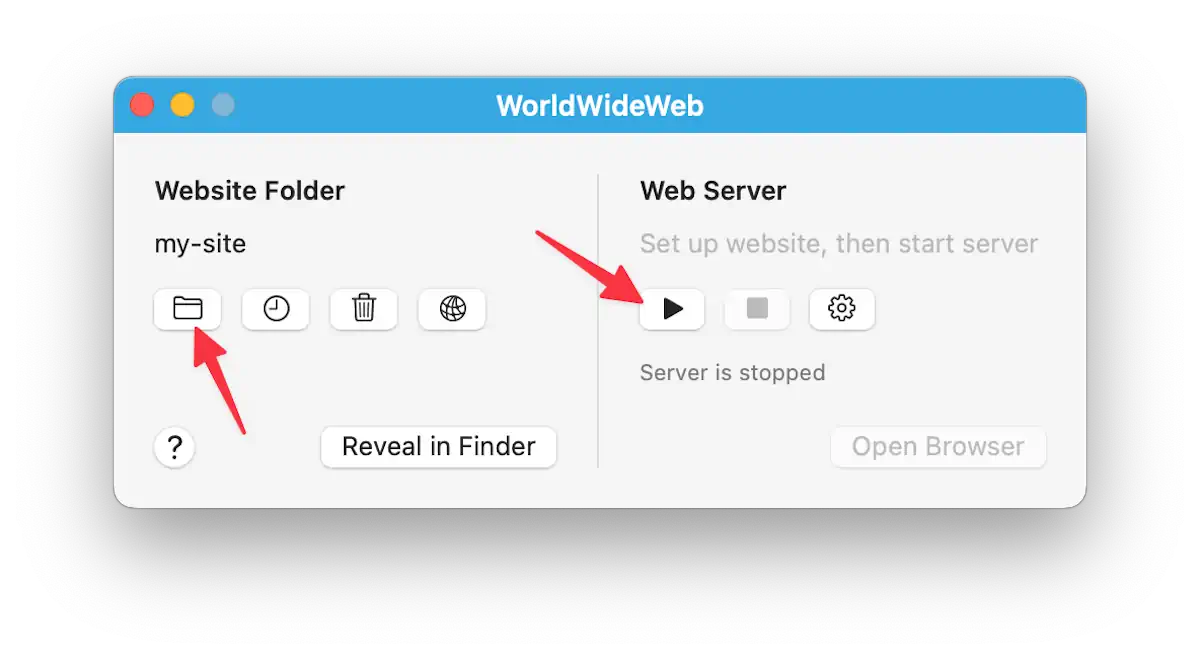
It works by telling it your website folder and then clicking the play button.
Once you click the play button, your site will be available at some address. Click Open Browser to visit that URL in your default browser.
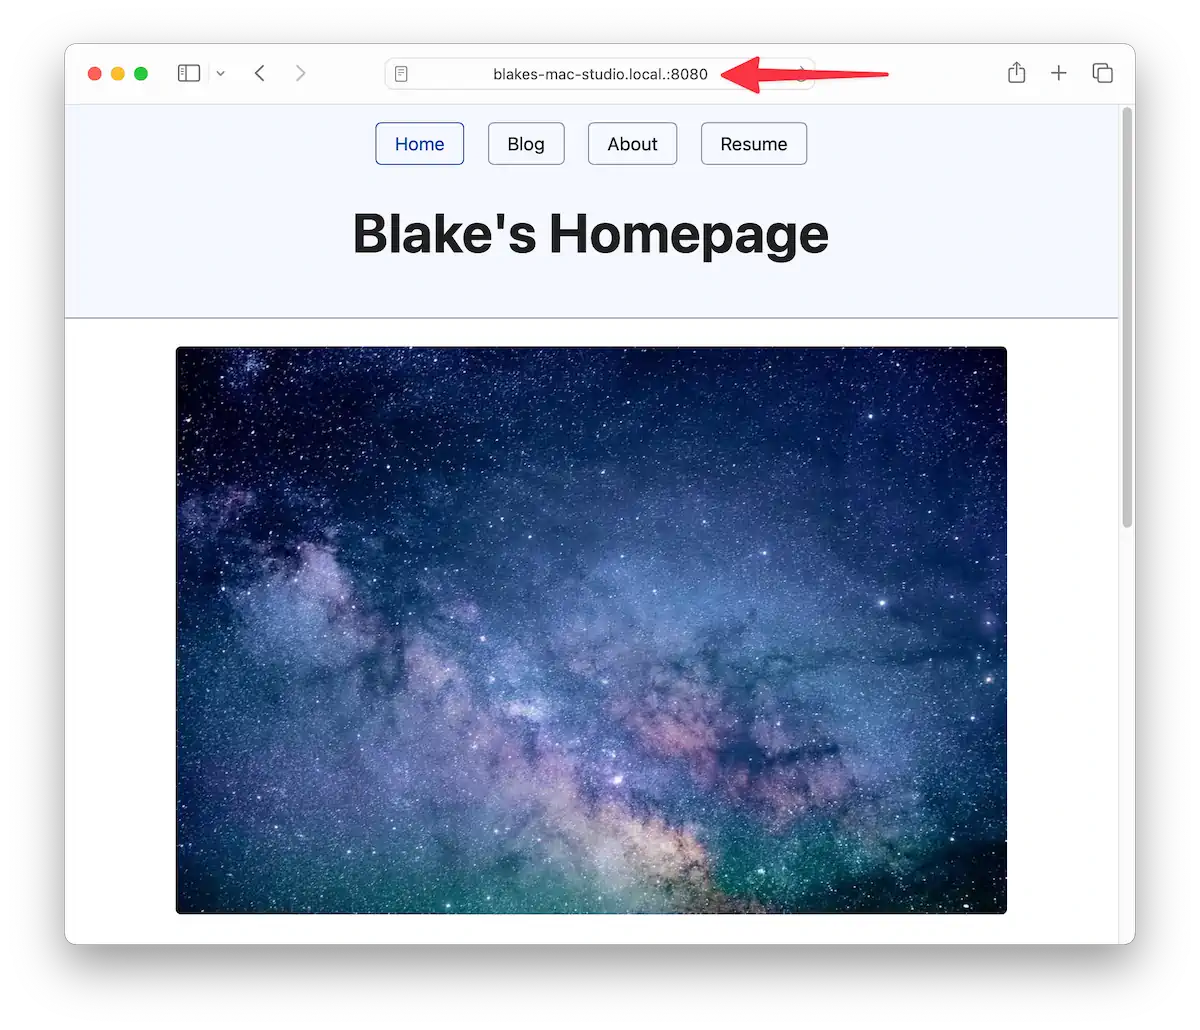
And now notice that we’re seeing our site at our shiny new web address.
Windows and cross-platform
For Windows users, I have two options for you. If you’re using Visual Studio Code, I recommend jumping to that section and checking out Microsoft’s Live Preview extension.
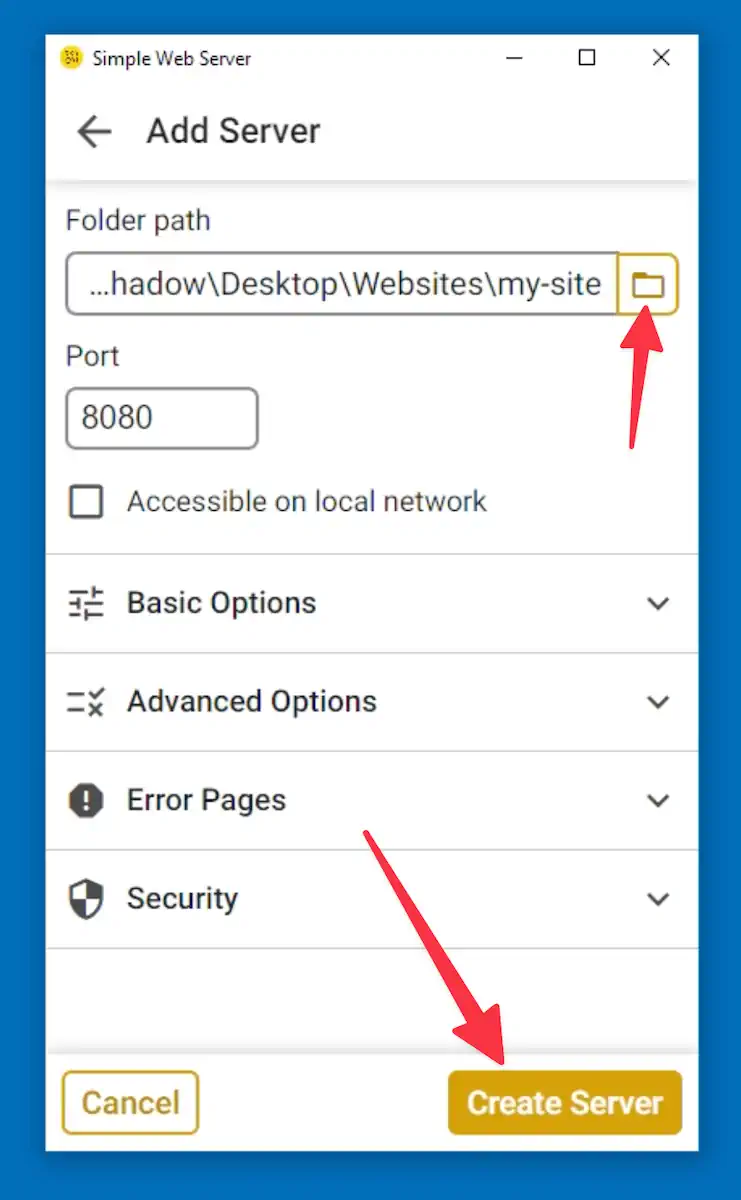
Otherwise, try Simple Web Server. Once you’ve installed it, you can click the button to create a new server.

You can then point it to your website folder by clicking the folder icon button and selecting the appropriate folder.
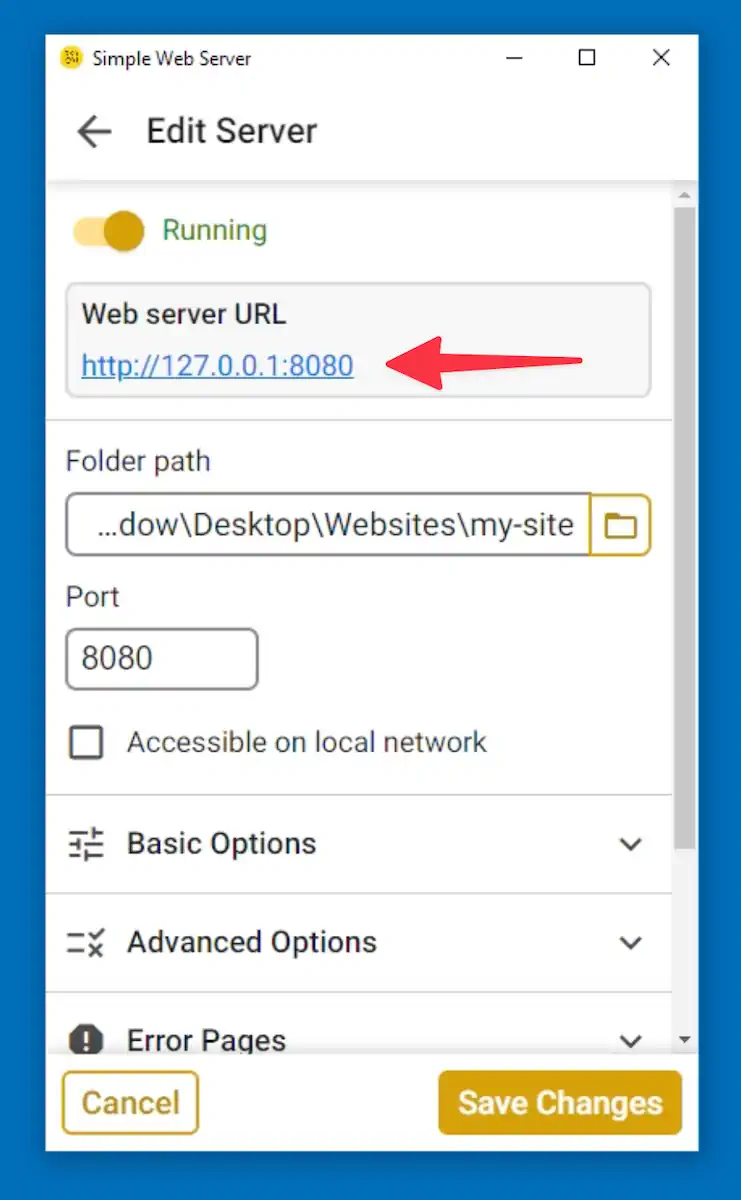
Once you have created the server, you’ll see it in the server list. Click it to open it. From there, you’ll see the URL where your site is available, and you can click the link to open it in your default browser.
Python and PHP (cross-platform)
This is a more technical option. You don’t have to be an elite hacker, but you will need to run a command-line program from your terminal app.
Python
If you don’t have either on your machine, Python is the easiest to set up. Go to the Python downloads page and download the installer for your system (get version 3).
Open a terminal window and cd to your website directory. Then, run this command to start the Python development server.
python3 -m http.serverThis will make your site available at localhost on whatever port it specifies (usually 8000). So your site address would be http://localhost:8000.
PHP
Installing PHP is out of scope for this book, but it’s available for nearly all systems. PHP was born as a website technology and, as I’ll discuss in a bonus chapter, PHP is handy for reusing HTML snippets (like the nav menu) across multiple pages.
If PHP is on your system, you can run the PHP development server similarly to the Python example above.
php -S localhost:8000This will make your site available at http://localhost:8000.
Up next
Now that we have a local web server, our website can interact more easily with other websites. Next, we’ll make a page with assorted fun stuff, including embedded videos from YouTube!